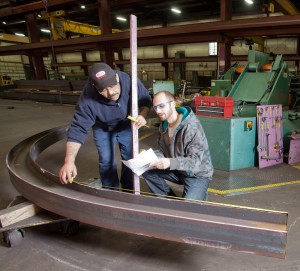
Curved steel sections are commonly manufactured to become component parts of machinery and equipment. Angle rings are used as parts for fan housings; steel tubing bent into a “U” shape is used as a hitch on a tractor; stem-in tees are welded to curved plate as tank stiffeners; and bar rings become parts for discharge chutes on rail cars. These component parts are often supplied by companies that specialize in curving and bending steel. Original Equipment Manufacturers (OEMs) turn to such specialized manufacturers because the Bender/Rollers often provide better quality, better response time, better service and better value than the OEM can provide for itself, “in house.” Perhaps the greatest demands of OEMs are in the area of quality. Which raises the question, how should we measure quality in curved steel parts?
A good definition of quality is conformance to the customer’s specification. In the case of curved steel sections, the dimensional specifications would typically include the following:
- Type of material: hot rolled, stainless, aluminum, etc.
- Section type: angle, channel, bar, tee, pipe, tube, rail, etc.
- Orientation: bars the “hard way,” angles leg-in, tees stem-out, etc.
- Radius: inside, outside, center-line, etc.
- Degree of arc or arc length
- Tangent length (if any)
- Special specifications for off-axis, helical, multi-radius, compound bends, etc.
The dimensions above are often given with tolerances. For example, certain common items like standard angle rings in diameters from 3in to 72in would typically have an inside diameter tolerance of +/- 1/6in, but for some applications this tolerance is +/- 1/32in. Large tube rings that frame a large cylinder on a hay baler have an outside TIR (total indicated readout tolerance) of +/- 1/8in. And large steel ribs as structural supports on rail tank cars have an outside radius tolerance of +0/- 1/8in.

There may be many additional tolerances specified, for example, flatness, weld quality, hole dimensions and locations, as well as fabrication tolerances (e.g. welding anchor plates on tunnel supports.)
In many cases, however, tolerances are not given. Bender/Rollers often have their own internal standards that they follow and that meet the needs of most OEMs.
In addition to dimensional tolerance, there may be specifications regarding surface finish, packing, coatings, etc.
Many OEMs provide their vendors with a quality scorecard indicating the percentage of parts received that met their quality standards. And many suppliers track their own record of quality. Corrective Action Reports (CARs) measure the number and cost of non-conforming parts and determine the root cause of the problems. An analysis of the source of the problem leads to its elimination. A global measure of a company’s quality is the cost of non-conforming parts (labor, material, credits) divided by the total sales dollars. Tracked over time, such a measure can indicate the percentage improvement of a company’s quality and success in meeting its customers’ needs.


